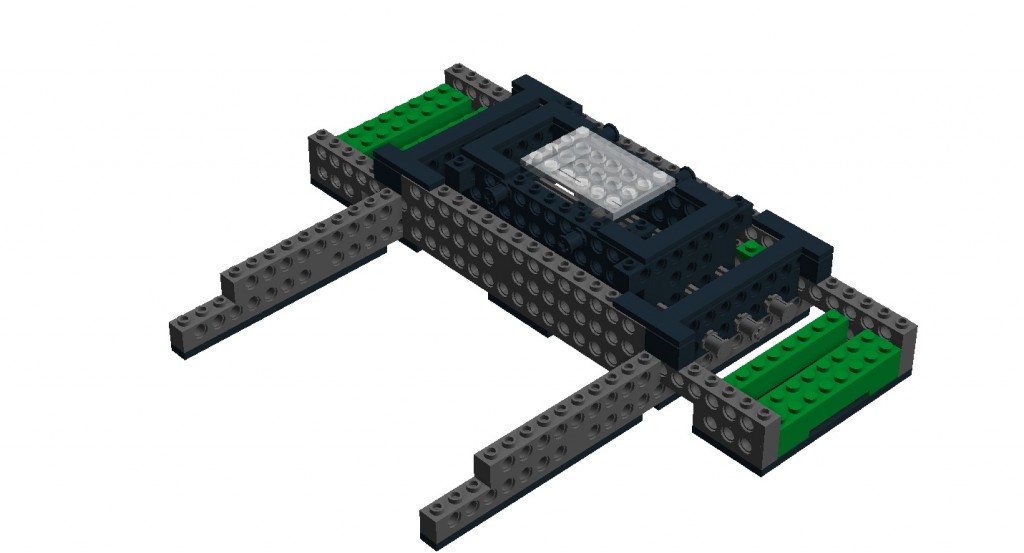
As promised earlier this year, it is about time to share our LEGO 3D rig, build out of „technic“ bricks. The only thing „non-LEGO you will need, is a base plate for your digital camera. You can use (almost) everyone from any tripod you own already, buy a new one, or order it online – like this one from Manfrotto. In the model the base plate is represented by the transparent LEGO plate „hovering“ on top.

to enlarge, click on the picture
Here are the building instructions: LEGO 3D rig or in a new window/tab
Or download the LegoDigitalDesigner-File: LDD 3D rig (right click and „Save as“, you know)
Now some advice and hints on the model.
Use the building instructions as inspiration. We are using the rig with a CANON DSLR camera, and depending on the objective we are using, the rig needs more stabilization on the side with the extensions sticking out on one side. Without them it could happen, that the camera simply tips over there. You can strengthen that part even more on your own quite easily.
You can move the rig from left to right, and back to the left. The „travel distance“ in-between (the interocular distance for all you stereographers out there – if you don’t have any calculation software yet, you’ll need it – read here why.) can be regulated with the help of the green bricks, attached on the outside – they are easily detachable. On the inside of the sliding plate are other green bricks, where they can be attached. With their help you can reduce the distance from about 6cm down to 2cm. The narrower the distance, the closer you can get to your animation objects. Well, you should know what you are doing before you are using the rig. Meaning: the focal length of your objective, the distance to the closest object in your scene as well as the distance to the one farthest away / horizon, and the above mentioned interocular distance. When you have set those parameters precisely, you can start animating, making one picture in the left position, and one in the right. That’s about it.
I hope you’ll enjoy using (and building / adapting) the rig as much as we did. When we’ll have our first 3D animations online, we’ll share a link to them here, obviously. Please feel free to do the same in the comments.
If you have questions, difficulties building it or any suggestions, please share them with us as well. We’ll see what we can do, and there’s always room for improvement.